How to Fix a Ring Doorbell That Keeps Ringing (Complete Guide)


When you buy through our links, we may earn an affiliate commission.
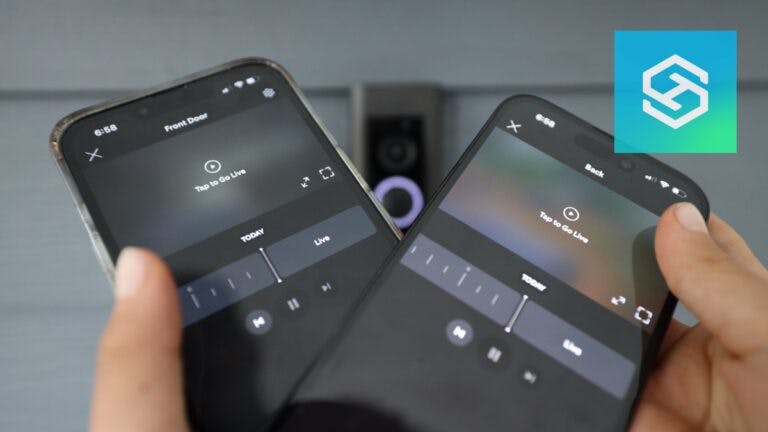
When you install a Ring Doorbell, you expect a new degree of security. You don’t expect round-the-clock false alarms that keep ringing randomly at night when no one is there.
Ring products are dependable quality devices. However, if your Ring Doorbell keeps ringing out false alarms, you probably want to fix the problem as soon as possible.
Check if the Button is Sticking
Sometimes the simplest solution is hiding in plain sight. Occasionally, the Ring Doorbell button may get stuck in place. This could be due to dirt or dust getting into the side or under the button.
To clean your Ring Doorbell button, use a soft microfiber cloth to remove any dust and debris around the button. You can also remove the faceplate and check and clean under there too.
If there is dirt that is stuck, remove your Ring Doorbell from power and use a few drops of isopropyl alcohol and a thin, cotton swab to loosen it. You can also use compressed air once it’s a little loose.

If you notice that parts of your Ring Doorbell are damaged, like the button is cracked, contact Ring Support to find out about your warranty and a replacement.
Make Sure the Ring Doorbell’s Battery is Charged
If you have one of the Ring Doorbell models that needs a battery, make sure the battery is fully charged. A low battery can cause some glitches.
The Ring Doorbells that rely on battery power are:
- First and second-generation Ring Doorbell
- Ring Doorbell 2
- Ring Doorbell 3
- Ring Doorbell 3 Plus
- Ring Peephole Cam
- Ring Battery Doorbell Plus
You can check your Ring Doorbell’s battery life by:
- Open the Ring App
- Select the three lines in the top left

- Choose “Devices“

- Select your Ring Doorbell

- Choose “Device Health“

There, you will see the battery percentage under Battery Level. If you need to charge your Ring Doorbell’s battery, replace it with a backup one since it can take up to eight hours to get a full charge.

If your Ring Doorbell constantly rings, it will make the battery die faster. If your battery won’t charge, there are some extra things to do.
Update the Ring Doorbell’s Firmware
A quick thing to check is your Ring Doorbell’s firmware version. If the firmware is outdated, you might experience some glitches with your device.
To check if your Ring Doorbell has a firmware update, open your Ring App and then:
- Tap the three lines in the top left
- Select “Devices“
- Choose your Ring Doorbell
- Select “Device Health“
- Where it says Firmware, it will tell you if it is Up to Date. If there is a number, you have an update available.

Normally your Ring Doorbell will automatically update its firmware. So if there is a number, which is the current firmware version, your Ring Doorbell needs an update.
The only way to force an update on your Ring Doorbell is to view the live feed or trigger motion. You can also wait for the least busy time of day for the update to automatically happen.
If your Ring Doorbell is battery-powered, you cannot use it during an update. You will know if there is an update in process for most Ring Doorbells if the light is flashing white.
Change your Ring Doorbell and Chime’s Settings
This next step is a big one because you will be going in and changing the settings for two devices. Your Ring Doorbell might not stop ringing because of the settings on the Ring Doorbell and your Chime.
The settings that need to be adjusted are
- Motion Alerts
- Motion Sensitivity
- Motion Zones
Motion Alerts
To adjust the motion alerts on your Chime:
- Open the Ring App
- Tap the three lines in the top left corner
- Select Devices
- Choose your Chime
- Select Audio Settings
- Select Chime Alerts
- Turn off the Motion Detected setting. This will stop your Chime from going off when there is motion but still go off if someone presses the button.
- Select Save
This removes the motion alerts from being sent to your phone and the Ring Chime. If you have more than one Ring Chime in your home, you must do this for each.
To adjust the Motion Alerts for the Ring Doorbell:
- Open the Ring App
- Tap the three lines in the top left corner
- Select Devices
- Choose your Ring Doorbell
- Toggle off the Motion Alerts, Motion Detection, and Motion Warning

You can keep them on, but this could be why your Ring Doorbell is constantly ringing.
Motion Sensitivity
You might be getting too many notifications, and your Ring Doorbell could constantly be ringing because of the Motion Sensitivity. To adjust the Motion Sensitivity:
- Open the Ring App
- Tap the three lines in the top left
- Select Devices
- Choose your Ring Doorbell
- Select Motion Settings

- Open Motion Sensitivity

From here, you can adjust the slider to increase or decrease the intensity of motion your Ring Doorbell picks up. You’ll want to move it more toward Min if your Ring Doorbell keeps ringing.

This also is helpful if you live in a busy apartment complex and people are constantly walking past your door. Be sure to save an changes made.
Motion Zones
The Motion Zones is a final setting you will adjust for a Ring Doorbell that keeps ringing. To edit the Motion Zones on a Ring Doorbell (or any Ring Camera):
- Open the Ring App
- Tap the three lines in the top left
- Choose Devices
- Select your Ring Doorbell
- Select Motion Settings
- Choose Camera Motion Zones

You can drag and alter your Motion Zones using the small circles. The area covered by the blue (or yellow) will be your new motion zones. Adjust it to your liking and hit Save.

This is useful if you live in a windy area with a tree constantly blowing, triggering motion alerts. You can cut the tree out of the area where motion is triggered, so you won’t get motion alerts every time the wind blows.
Reset Your Ring Doorbell
Resetting a Ring Doorbell is simple. However, the reset button is located in different areas depending on your generation or version:
- Ring Doorbell first and second generation – reset button is orange and located on the back of the device.
- Ring Doorbell Pro, Wired, Pro 2, and Elite – reset button is located on the right side of the camera under the faceplate.
- Ring Doorbell 2, 3, 3 Plus, 4, and Battery Video Doorbell Plus – reset button is black and is located on the front under the faceplate.

Regardless of the device, you have to hold the reset button down for 15 seconds to reset it. Once it’s reset, you’ll have to add the device to your app again.
A hard reset will clear up any software glitches that will sometimes crop up, especially if your device is older.
Check the Signal Frequency
Sometimes there might be an interruption in communication between your Ring Doorbell and a device. Your Ring Doorbell could be ringing nonstop because something is running at the same frequency.
RFI (Radio Frequency Interference) is a problem for z-wave devices. You can detect RFI by shifting your devices closer to the mesh hub. If their signal improves, you are probably experiencing interference.
Unfortunately, you can’t move your Ring Doorbell closer to a hub. Move the hub closer to the doorbell.
Move your devices until you have a secure and stable connection with the Z-wave hub. If frequency interference affects your Ring Doorbell’s performance, this is the best way to resolve the problem.
Thoroughly Check Wiring
This should be a priority if your original doorbell was old and replaced with the wired Ring Doorbell. Occasionally, fraying wires, thinning insulation, or fully exposed wires will touch and create problems with the Ring Doorbell.
Shut the power off from the main circuit breaker before inspecting the wires. Signs you need to have the wires replaced are:
- Fraying
- Old or discolored insulation around the wires
- Exposed metal
After you replace the wires, ensure the wires are as separated as possible before replacing the device.
If you need more help with the hardwiring for your Ring Doorbell, we have an excellent guide.
Check Your Transformer
A doorbell transformer will typically be between 8 and 24 volts. The voltage is labeled on the outside casing. If it doesn’t match the voltage requirement for your wired Ring Doorbell, you may have found your culprit.
The Ring Doorbell voltage requirements are slightly different depending on which Ring Doorbell you have:
| Doorbell Model | Ring Video Doorbell Wired | Ring Video Doorbell Pro | Ring Video Doorbell Pro 2 | Ring Battery Doorbells |
| Voltage Requirement | 10-24 volts | 16-24 volts | 16-24 volts | 8-24 volts |
If it does match, you need to use a voltmeter to check the current on your transformer.
Also, if you have a mechanical chime, there could be two different voltage requirements for the chime and the Ring Doorbell. You may have to replace your chime with a Ring Chime Pro or use the Ring Doorbell with the smart app.
Reading your Voltometer Results
If you’re getting nothing on the voltmeter, the problem is coming from somewhere else, possibly a wiring issue.
If the volt range is more than 2v lower than the transformer’s capacity, it’s time for a replacement.
Transformers often push a higher voltage than listed, and that’s normal. If the voltage is much higher—as in more than 5v—you should consider replacing the transformer.
You can also install a resistor to lower the current that’s applied to your doorbell.
Keep in mind that you must check with local laws and building codes before doing any electrical work on your home. Many cities require this work to be done by a licensed electrician.
When dealing with wired devices, transformers, or anything electrical, always remember to shut the power down from the main circuit breaker. An annoying doorbell isn’t worth your life.
Install the Diode
If you didn’t install the Diode when you first installed your Ring Doorbell, you should install it to stop your Ring Doorbell from constantly ringing.
This only applies to the Ring Video Doorbell and Ring Video Doorbell 2 and if you use a digital chime. Newer Ring Doorbells already have the Diode installed in them, and the Diode can damage a mechanical chime.
Installing the Diode is simple:
- Turn off the power at your circuit breaker
- Carefully pick up the Diode and see the small black marking at one end
- If you have a Ring Video Doorbell, you will install the Diode on the mounting bracket. If you have the Ring Video Doorbell 2, you will install the Diode on the back of the doorbell.
- Put the coils over the screws with the black marking at the top
- Screw in the Diode
- Reinstall your Ring Video Doorbell and test it to make sure it works.
If it doesn’t work, take out the Diode and turn it over, still keeping the small black marking at the top between the screws.
Enlist Professionals
If you’ve gone through all the following troubleshooting steps and your Ring Doorbell is still ringing, reach out to our Tech Supportal. They can help you with any device at any time.
You can also contact Ring Support to find out if your Ring Doorbell is under warranty to see if you qualify for a replacement.