How To Get Blink Camera To Record- 3 Easy Steps


When you buy through our links, we may earn an affiliate commission.
Blink Cameras is owned and operated by Amazon. This comes with some great conveniences. Since Amazon houses and operates many internet servers, they have unlimited space for your cameras to record. The only downside is you need a subscription to their Blink service to do it.
Since Blink Cameras aren’t always recording, you must record your videos manually. You don’t need an Amazon Blink subscription to make your Blink Camera work, but most people opt for the subscription service to save themselves some trouble. So, how do you get a Blink Camera to record?
How To Get Blink Camera To Record
First, you need to know what generation of Blink camera you have. The older Blink Cameras sold before April 15th, 2020, do not require a Blink subscription and should have access to free cloud storage for recording their live video feeds. Cameras made after April 15th, 2020, require either a Blink subscription or a Blink Sync Module 2 with Local Data Storage.
- Set up an Amazon Blink Subscription
- Record Video from Live View
- Save Clip from Motion Clips
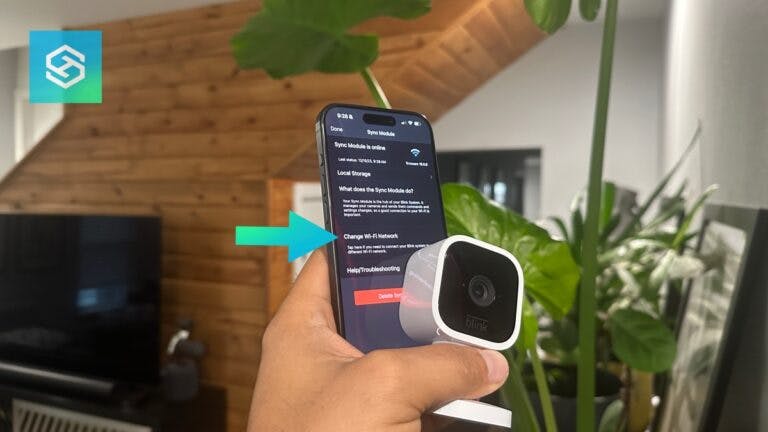
Sync Module 2 is a local hub that connects up to 10 Blink Cameras to be controlled through the Blink app. It also has a USB port which a USB drive can be plugged into, and live video feed videos and motion videos can be saved locally to the USB hard drive or thumb drive. The option to connect to the Sync Module 2 is only available on certain model Blink Cameras.
The current models able to utilize the local storage of the Sync Module 2 are:
- Blink Indoor & Outdoor Camera
- Blink Mini Camera
- Blink Doorbell Camera
If you have one of the older models (XT, XT2, Indoor (Gen 1), you will not be able to utilize the Sync Module 2 hub station. If you’ve already got a Blink Subscription plan, keep reading. If you want to purchase one, jump ahead to learn more about their subscriptions.
How to Record from Live View on Your Blink Camera App
The first method of getting your Blink Camera to record video locally to your Sync Module 2 or your Blink Cloud Storage is to save a video from your Live View in the Blink Camera App. Saving Live Views is only available on the Indoor & Outdoor (Gen 2), Blink Mini, and XT2 models. Live view is unavailable on the Blink doorbell, XT, or Indoor & Outdoor (Gen 1).
To save a video from your Live View in the Blink Camera App:
- Open your Blink Camera App
- Open the Live View of any of your Blink Cameras – The Live View button is the button in the lower-left corner of the live video feed from your camera on the Home Screen.
- In the Live View screen, there is a toggle under the video that says Save and Discard
- Tap the Save Button to store the video session to your primary storage location – either locally or in the cloud, depending on your settings
The video will now be available to view where your videos are stored.
How to Save Clips from My Motion Clips in the Blink App
Motion clips are automatically generated by the Blink App and your Camera’s AI motion detection software. They can detect motion from about 25 feet away. If you wish to save one of the motion clips, simply follow these instructions to save them to your preferred storage location.
- Go to the Home Screen of the Blink Camera App
- Tap the Clip Roll Icon on the bottom menu to access your clip list.
- You will now see a list of your motion clips.
- Select one of the clips you would like to save – the video should start playing automatically.
- Tap the playing video to access the pause menu
- From here, you will be able to save the motion clip to your chosen location
If you have a Blink Subscription, your motion clips and saved Live View videos that were saved locally on your Sync Module 2 backup will be automatically uploaded to your Blink Subscription Cloud Storage account. If the subscription ends, any clips will be downloaded to your Sync Module 2 before being deleted from the Blink servers.
How to Set Up a Blink Subscription
Next, head to Amazon and purchase a Blink Subscription plan. You can start saving videos to your cloud account with a plan selected. There are two plans currently available: the Blink Basic Plan and the Blink Plus Plan.
Here is a table that breaks down the main differences between the two plans:
| Blink Basic Plan | Blink Plus Plan | |
| Number of Cameras | 1 | Unlimited |
| 10% off Blink branded devices on Amazon.com | No | Yes |
| Extended Warranty | No | Yes |
| Price | $3 per device – per monthor$30 per year | $10 per month for an unlimited number of camerasor$100 per year |
In terms of recording, both plans offer:
- Live view recording
- Motion detect recording
- 60-day video history
- Rapid video access
- Video sharing
- Photo capturing
Cloud Storage for your Blink Camera with a Blink Subscription plan will store an unlimited number of clips. The default settings are for each clip to be saved for 60 days before automatically deleting the clip. This can be changed from 7 days to 60 days in the Blink Camera app settings.
Conclusion
Amazon makes managing the Blink Cameras easy through the app, but they try and push you towards a subscription. While not 100% necessary, the relatively low price, unlimited storage space, instant video access anywhere with an internet connection, and streamlined app make the subscription the obvious choice. Something I’m sure Amazon did by design.