How to Remove Image Backgrounds in Canva and Export as Transparent

By Trae Jacobs,

When you buy through our links, we may earn an affiliate commission.
Your image has a background you need to remove. You can fix this quickly using the built-in tools in Canva.
- Open your project in Canva and resize your image so it fills the entire artboard [0:41].
- Select the image and click the Background Remover button in the top ribbon [0:49].
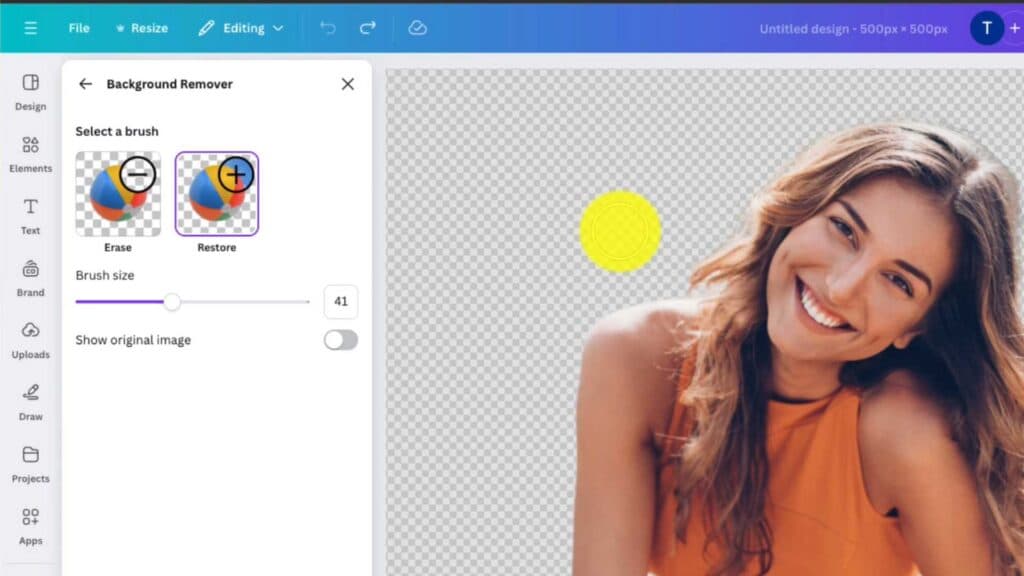
- Refine the cutout by clicking Edit and selecting the Background Remover settings if the tool missed any details [1:04].
- Use the erase or restore brushes to manually adjust which parts of the image show up [1:12].
- Click the Share button in the upper right corner and select Download [1:58].
- Choose PNG as the file type, check the Transparent background box, and hit Download to save your file.
Ninja Tip: If you need to remove a background from a file that is already saved as a JPG, convert it to a PNG first because JPG files do not support transparency data.
If the remover fails to detect your subject correctly, ensure your image has high contrast between the foreground and the background to help the software process it.
Keep Reading