How To Change Default Printer on Mac

By Trae Jacobs,

When you buy through our links, we may earn an affiliate commission.
Your Mac selects the wrong printer every time you try to print a document. You can resolve this by updating your system settings.
- Click the Apple menu in the top left corner of your screen and select System Settings [0:10].
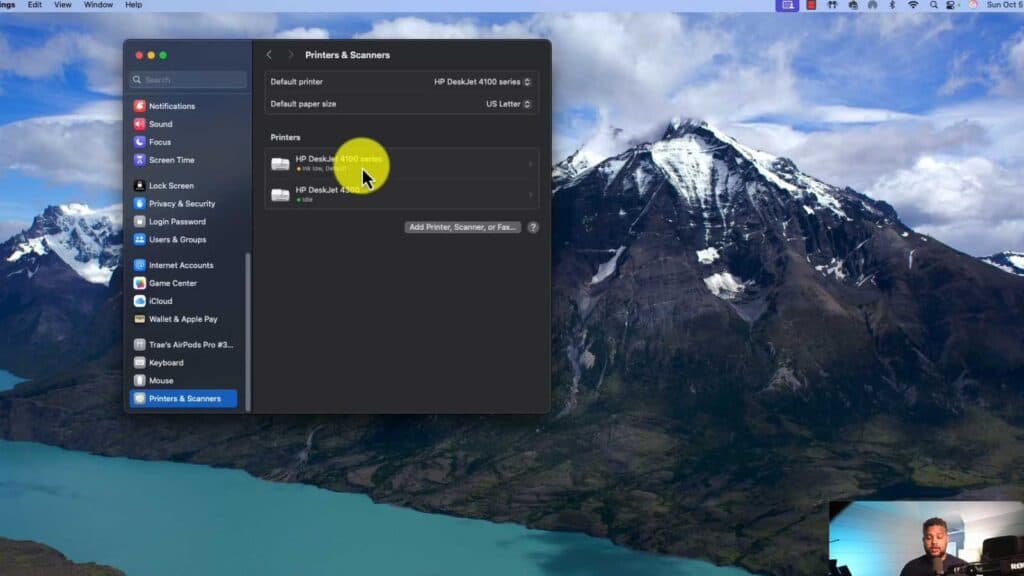
- Type “printer” into the search bar or scroll to the bottom of the list to select Printers & Scanners [0:14].
- If your desired printer does not appear in the list, click the Add Printer or Scanner button to locate and add your device [0:32].
- Select the specific printer you want to use from your list of devices [0:48].
- Click the Set default printer button at the bottom of the window, then click Done to save your changes.
Ninja Tip: macOS often defaults to the last printer you used, so if you find it keeps switching back, check the setting labeled “Default printer” in the same menu and change it to “Last used printer” if you prefer that behavior instead.
If you continue to experience issues, navigate to Settings > General > Transfer or Reset > Reset all settings.
Keep Reading


