How to Insert and Customize a Table of Contents in Google Docs

By Trae Jacobs,

When you buy through our links, we may earn an affiliate commission.
Your Google Doc lacks a navigable table of contents. You can easily add one to help your readers jump to specific sections.
- Place your cursor at the very beginning of your document where you want the table of contents to appear.
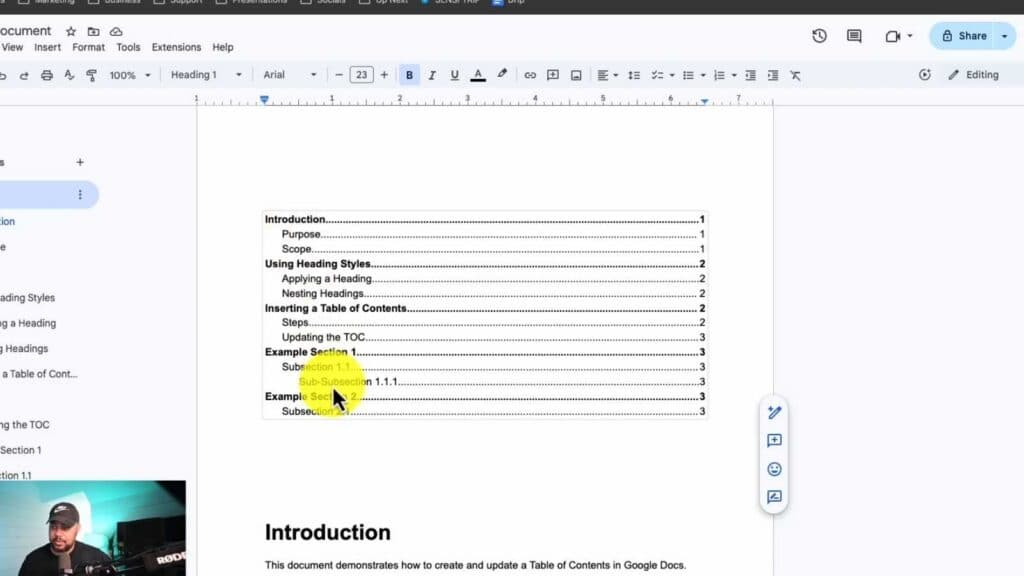
- Go to the Insert menu, select Page elements, and then click Table of contents to choose your preferred style [0:36].
- Click inside the newly created table and select the three dots to open More options for deeper customization [1:40].
- Adjust the indentation levels for your headings (H1, H2, or H3) by typing in your preferred measurements [1:52].
- Toggle settings like Show page numbers or choose a different Leader style to change how the table looks [2:45].
Ninja Tip: If your table of contents doesn’t update automatically after you add new headings, click the circular refresh icon that appears in the top-left corner of the table box to sync your changes.
To start over completely, highlight the table, click the three dots, and select the remove option.
Keep Reading


