How to Create and Format Columns in Google Docs

By Trae Jacobs,

When you buy through our links, we may earn an affiliate commission.
Your text is currently displayed in a single block across the entire width of the page. You can split your document into multiple columns using the built-in formatting tools.
- Type all the text you want to include in your document first.
- Go to the “Format” menu, select “Columns,” and choose the two or three-column layout [0:44].
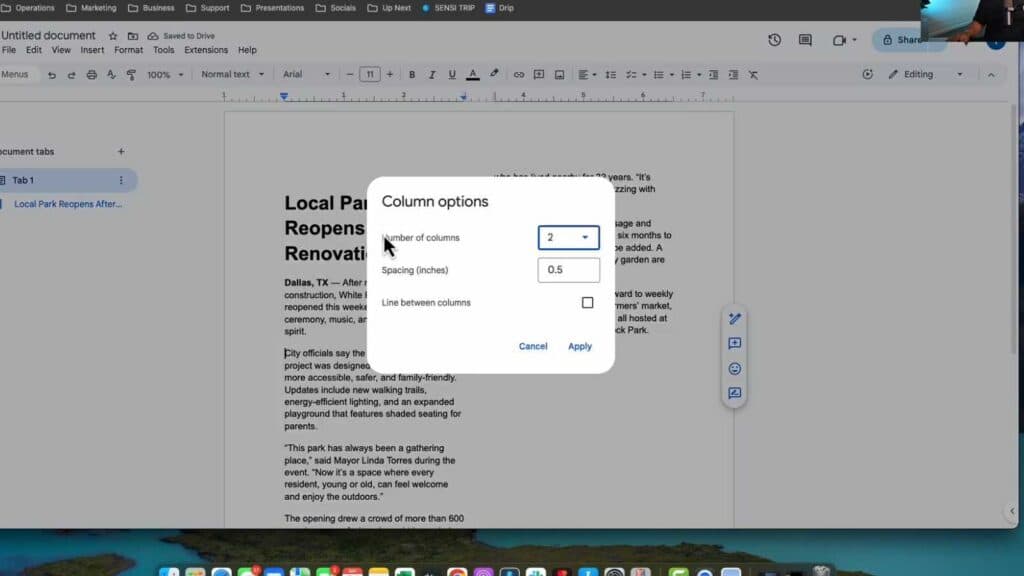
- Click “More options” within the column menu to adjust the spacing between columns or add a vertical line between them [1:10].
- To keep your title full-width while splitting the text below it, select only the body copy before applying the column layout [1:36].
- Adjust your spacing and line settings in the “Column options” menu to finalize the look.
Ninja Tip: You can force text to jump to the next column by placing your cursor where you want the break and selecting “Insert” > “Break” > “Column break” to control exactly where your text flow splits.
If you need to return your document to a standard single-column layout, go to Format > Columns and select the single-column icon.
Keep Reading


