How to Find the Apple HomePod Mac Address


When you buy through our links, we may earn an affiliate commission.
Do you want to connect your HomePod to your Wi-Fi network in order for it to be in your trusted device? But, you can’t because it’s requiring you to determine its MAC address? That’s where we come in hand. In this article, we will guide you to determine the MAC Address to your HomePod device and add it as your trusted device.
The media access control address (MAC) is a unique identifier assigned to a network interface which is used for network communication within a network segment. It is commonly used in IEEE networks, WI-FI and Bluetooth.
How to Determine the HomePod MAC Address
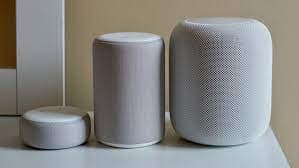
Usually, when buying an iPhone or iPad, the MAC address is given either on the box or inside, but in this case it’s the Apple HomePod. A smart speaker with no display screen, so how can you determine the MAC address?
Here are easy steps to find the MAC of your HomePod:
- Prepare your HomePod to be ready to pair.
- Connect your IOS to a Wi-Fi hotspot on a different device.
- Pair the HomePod and the IOS device was connected.
- After the setup has been completed, search under the list of connected devices in the device used for the hotspot.
- In the list, you would see ‘HomePod’. Click on it and it will show you the MAC address.
- Add the MAC address to the network you would want to connect it with.
- Remove HomePod from Homekit app.
- Manually reset the HomePod.
- Connect your iPhone/iPad to your preferred Wi-Fi.
- Start to repair your HomePod.
The HomePod doesn’t support subscription or captive networks. If the HomePod has been set up with any of these networks, you would have to reset the HomePod and set it up again.
How Do I Reset My HomePod?
Apple’s smart speaker can be reset if it isn’t responding or you are trying to access your MAC address. Fortunately, it is easy to reset your HomePod and you could use any of these three methods: using the Home app manually or using your Mac/PC.
Use the Home app to Reset the HomePod
Make sure you have signed in to the Home app using your IOS device with the Apple ID you used to set up the HomePod.
This is how to factory set and remove the HomePod from the Home app, using these steps:
- Open the Home app on your iPhone, iPad, or MacBook.
- Press and hold on HomePod, then scroll down and click on ‘Remove Accessory’.
- Tap on Remove.
Now, let’s take a look at resetting the homepod manually.
Reset the HomePod Manually
If you can’t reset your HomePod with the Home app, you could always reset it manually. Here’s how:
- Unplug your HomePod for 10 seconds and plug it back in. Wait for an additional 10 seconds before resetting.
- After 10 seconds, place your fingers and press the top of the HomePod. Hold it there.
- The white light will turn red, still keep your fingers pressed down on the top of the HomePod.
- Siri would mention that the HomePod would reset, and you would hear three beeps. Then remove your fingers.
If you still see the HomePod on your Home app, you can simply remove the HomePod manually from the Home app.
Reset HomePod Using a Mac or PC
Here’s how to reset your homepod using a mac or pc:
- Plug the HomePod in your Mac or PC using the USB that came with it.
- Wait a few seconds and open the Finder window on the Mac. If you’re using a PC, open the updated iTunes.
- Select your HomePod when it appears on your screen.
- Click Restore HomePod.
- Once the orange flash stops, the HomePod has been restored.
If you would like to see more on the homepod, check out this article.
How to Set Up Your HomePod
The Apple HomePod won’t be so exciting until you set it up. Luckily, it’s very easy to set up a HomePod as long as you have your iPhone or iPad included.
Here’s how to set up your HomePod:
- Plug HomePod into an outlet. Wait till you hear a chime and see a white light appear on the top of the HomePod.
- Unlock your iPhone, iPad or iPod touch and hold it next to the HomePod. You would see a Set Up option pop up on your screen. Tap on it.
- Select which room your HomePod is in, and tap continue.
- Next, you would follow the on-screen instructions given to set up your HomePod.
- On the on-screen instructions, you would be asked if you want to set up two HomePods as a stereo pair and if you want a personal request. You could also see what the HomePod can do and if you want any changes, you can follow how to change the settings in the Home app.
- Simplify position the top of your HomePod in the middle of the circular frame on your screen.
- If you cannot use your camera, Siri would say a code and you can enter the code manually into the keypad.
- Wait for the HomePod to set up. It would take a few minutes to process.
- Then, tap Done when the HomePod has successfully completed setting up.
If you don’t seem to see the Set Up pop on your screen, you can set up manually by just opening the Home App, tap the ‘+’ icon, tap Add Accessory, tap Don’t have a Code, then tap HomePod and follow the on-screen instructions.
You can’t set up the HomePod on a Mac or a PC.